Convert to Home Assistant Theme
The Material Theme Builder does not export DSP files anymore
This part of the manual is only there for existing DSP export files.
Introduction
As I don't create a theme every day, the conversion is a bit primitive, but it works for me!
Using this method, I was able to create & convert about 7 themes per hour. Normally I need several hours to create a theme.
The short version of the how-to
The conversion uses the following steps, which are explained more visually further on:
Step 1:
- Get the
tokens.jsonfrommaterial\theme\datafolder inside the zip file.
Step 2:
- Add to
m3.yamltemplate file insak_templatesfolder and save.
Step 3:
- Select the
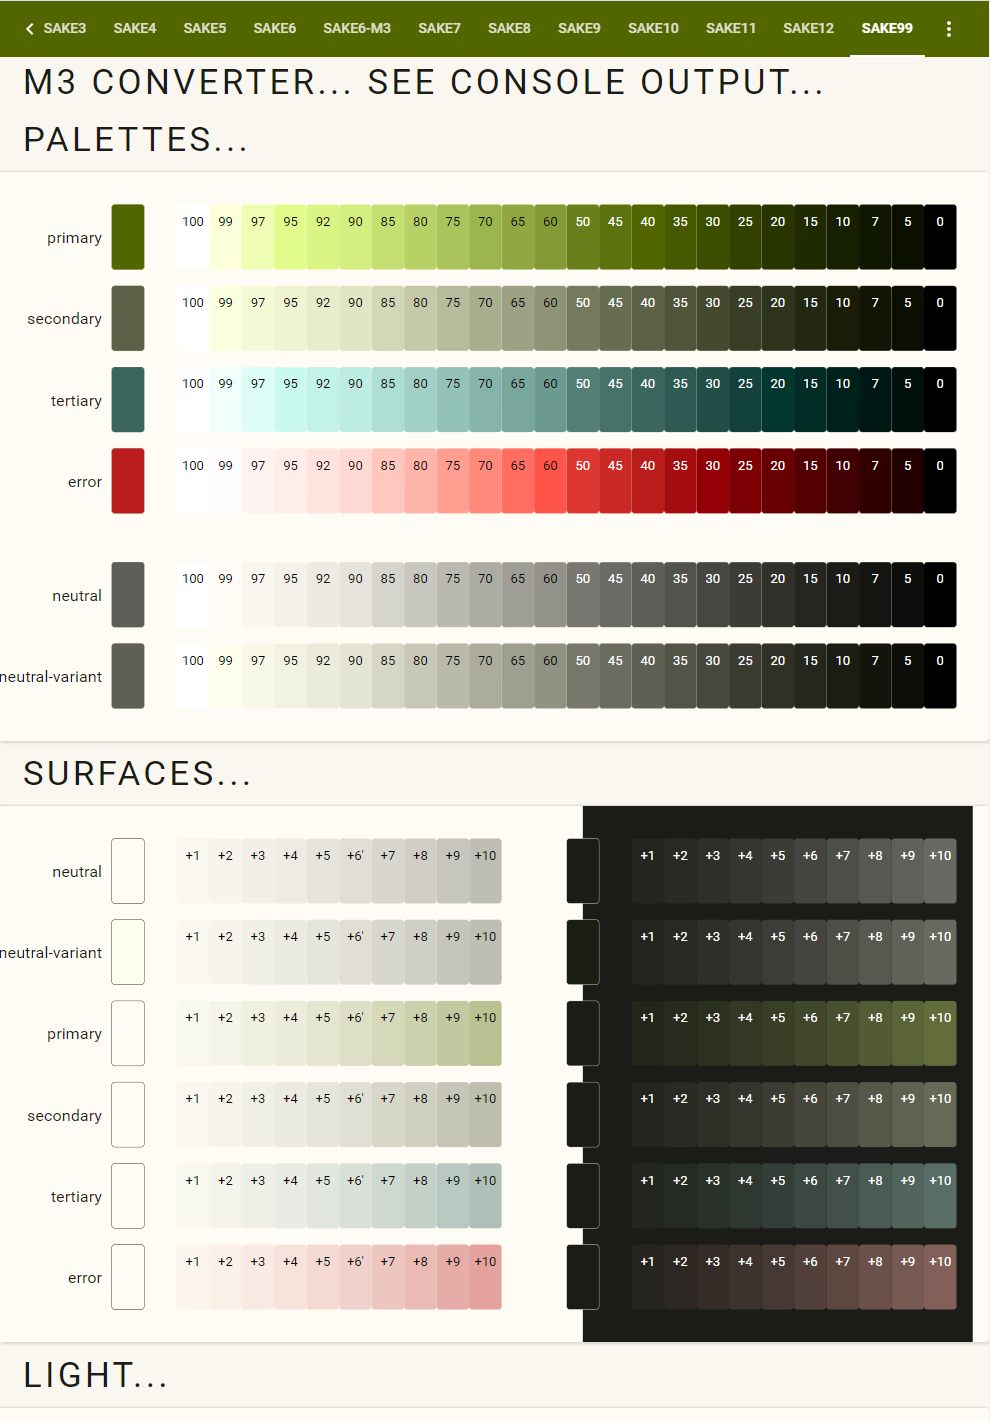
view-sake99.yamlin Home Assistant. This view shows the active Material 3 theme. - Hit ctrl-F5 to refresh/reload Home Assistant. This includes the
m3.yamltemplate.
Step 4:
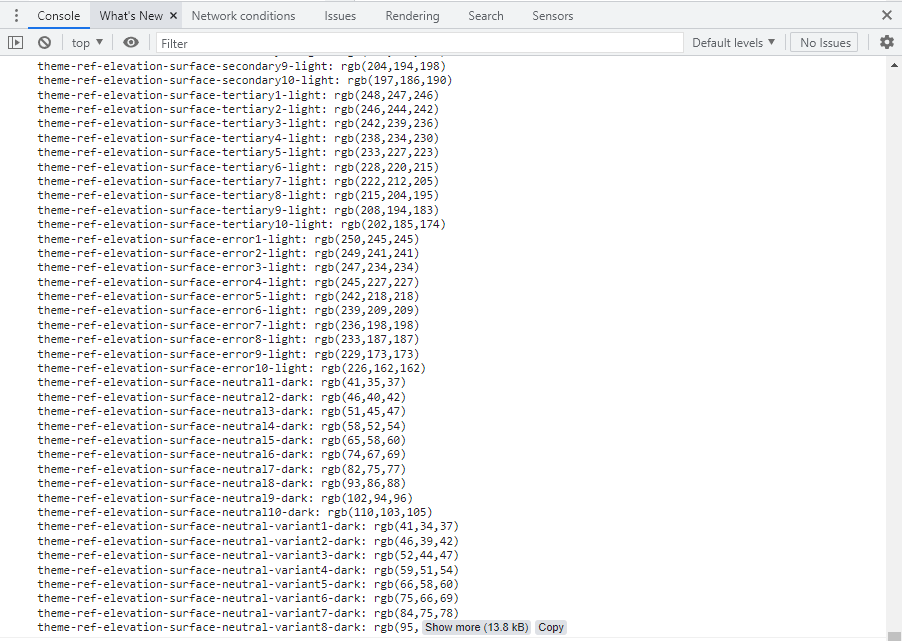
- Check the Chrome console for the output of the converter
- You can see a large block, with a "copy" button as the list is long (thank you Chrome for this!)
- Copy the translated theme definitions into the theme and save.
Step 5:
- Reload Home Assistant themes
- And now you can select the newly created theme. The sake99 view should now display your new theme!
The long version of the how-to
Step 1: Open the exported ZIP file to get the tokens.json file
Exported zip file/
.
├─ material-theme/
│  └─ data/
│     └─ tokens.json
You can open that file with any editor. It contains the design tokens definitions.
{
  "dsp_spec_version": "0.0.1",
  "last_updated_by": "Material",
  "last_updated": "Wed, 16 Feb 2022 10:46:10 GMT",
  "entities": [
    {
      "class": "token",
      "type": "color",
      "id": "md.sys.color.primary.light",
      "name": "md.sys.color.primary.light",
      "value": "#bb1826",
      "description": "",
      "category_id": "sys.color.light",
      "last_updated_by": "Material",
      "last_updated": "Wed, 16 Feb 2022 10:46:10 GMT",
      "tags": [
        "md",
        "sys",
        "color",
        "primary",
        "light",
        "color"
      ]
    },

    ...

  ],
  "categories": [
    {
      "id": "sys.color.light",
      "label": "Light"
    },
    {
      "id": "sys.color.dark",
      "label": "Dark"
    },
    {
      "id": "sys.color",
      "label": "Default"
    },
    {
      "id": "ref.palette",
      "label": "Palette"
    }
  ]
}
Step 2: Open/Create the m3.yaml file and copy the tokens into that file
#
# Project   : M3 token to theme converter.
#             Uses the Swiss Army Knife custom card for Home Assistant.
#
# Repository: https://github.com/AmoebeLabs/m3-themes
#
# Author    : Mars @ AmoebeLabs.com
#
# License   : CC BY-SA, https://creativecommons.org/licenses/by/4.0/
#
# -----
# Description:
# This is the SAK template file that is used to convert the tokens.json file
# from a Figma M3 theme DSP export.
#
# The tokens.json is in <zip file>/material-theme/data folder.
# - Copy the contents of the tokens.json into this file below the m3: tags
# - indent with 2 spaces!
# - save this so called template into the SAK_Templates/templates/ folder
# - reload Lovelace to load the m3.yaml file
# - At this moment: use view-sake99.yml as the view to convert the m3.yaml
#   to Home Assistant CSS theme vars.
# - output is in the Chrome console: copy this block and insert it into the theme!
#   Use right-mouse / Inspect to go to the Chrome console.
#
# Refs:
#
################################################################################
m3:
  {
    "dsp_spec_version": "0.0.1",
    "last_updated_by": "Material",
    "last_updated": "Wed, 16 Feb 2022 10:46:10 GMT",
    "entities": [
      {
        "class": "token",
        "type": "color",
        "id": "md.sys.color.primary.light",
        "name": "md.sys.color.primary.light",
        "value": "#bb1826",
        "description": "",
        "category_id": "sys.color.light",
        "last_updated_by": "Material",
        "last_updated": "Wed, 16 Feb 2022 10:46:10 GMT",
        "tags": [
          "md",
          "sys",
          "color",
          "primary",
          "light",
          "color"
        ]
      },

      ...

    ],
    "categories": [
      {
        "id": "sys.color.light",
        "label": "Light"
      },
      {
        "id": "sys.color.dark",
        "label": "Dark"
      },
      {
        "id": "sys.color",
        "label": "Default"
      },
      {
        "id": "ref.palette",
        "label": "Palette"
      }
    ]
  }
Step 3: Go to the SAKE99 view, and hit ctrl-F5 to reload Lovelace
The refresh should force Home Assistant to reload everything, including the newly created/updated m3.yaml template.
I use the SAKE99 view, but ANY SAK card can do this if it has the m3: true debug flag set
That debug flag triggers the Material 3 conversion to the console!
1 2 3 4 5 6 7 8 | |
The view looks like this:

Step 4: Copy the console output
And once you have hit ctrl-F5 to refresh, you should see this kind of output in the Chrome console.
Now copy (look at the copy button) this data.

And paste it into a Material 3 theme template file between the START and END markers.
Make sure that you've got your indentation right with 2 spaces!
#
# Theme     : m3-07-darkolivegreen.yaml
# Project   : Home Assistant
# Repository: https://github.com/AmoebeLabs/HA-Theme_M3-07-DarkOliveGreen
#
# Author    : Mars @ AmoebeLabs.com
#
# License   : CC BY-SA, https://creativecommons.org/licenses/by/4.0/
#
# -----
# Description:
#   Dark / Light theme based on Material 3 for Home Assistant.
#
# According to: https://encycolorpedia.com/526600
#   - Dark Olive Green
#
###############################################################################
#
M3-07-DarkOliveGreen:
  # Colors generated via Material Design 3 (Material You) DSP export of figma
  #
  # --------------------------------------------------------------------------
  # ==================== START of M3 copy/paste configuration ================
  # --------------------------------------------------------------------------

  theme-ref-elevation-surface-neutral1-light: rgb(249,247,239)
  theme-ref-elevation-surface-neutral2-light: rgb(246,244,236)
  theme-ref-elevation-surface-neutral3-light: rgb(241,239,232)
  theme-ref-elevation-surface-neutral4-light: rgb(237,235,227)
  theme-ref-elevation-surface-neutral5-light: rgb(230,228,221)
  theme-ref-elevation-surface-neutral6-light: rgb(224,222,215)
  theme-ref-elevation-surface-neutral7-light: rgb(216,214,207)
  theme-ref-elevation-surface-neutral8-light: rgb(208,206,199)
  theme-ref-elevation-surface-neutral9-light: rgb(198,197,190)
  theme-ref-elevation-surface-neutral10-light: rgb(190,189,182)

  ...

  # --------------------------------------------------------------------------
  # ==================== END of M3 copy/paste configuration ==================
  # --------------------------------------------------------------------------
Step 5: Reload themes and enjoy!
Now reload the Home Assistant themes with the Developer Tools' > 'Services' > 'frontend.reload_themes' service.
Then select your just created theme and start using it.
You can validate the theme using the sake99 view, as it displays the active Material 3 theme.